
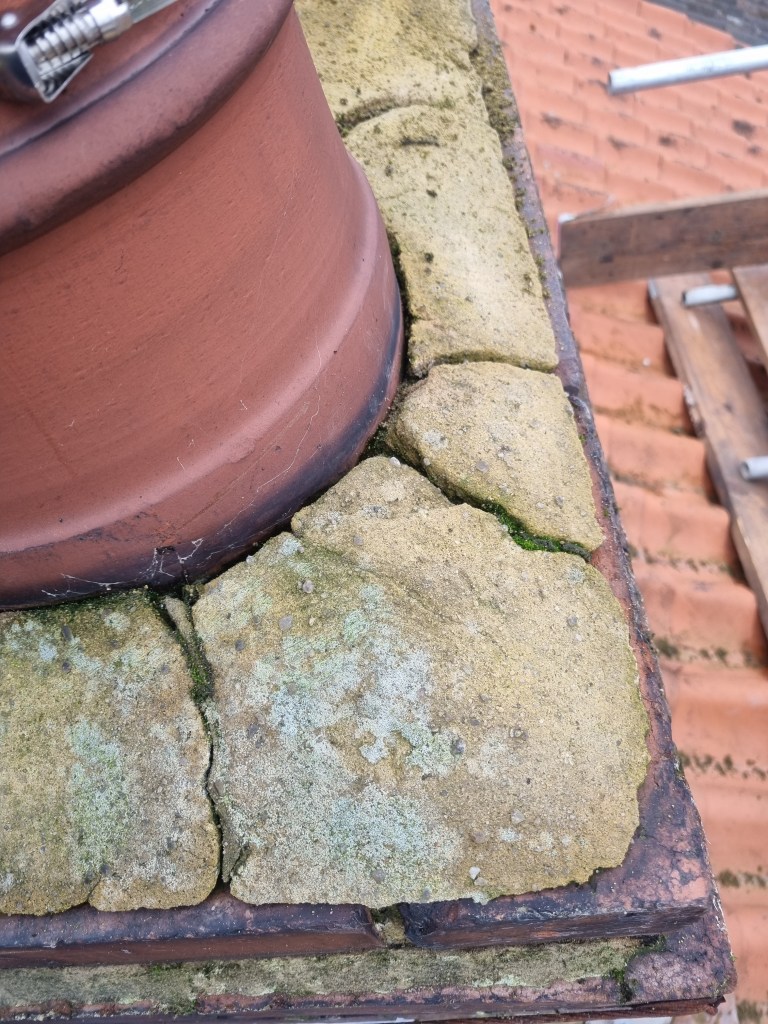
A job I carried out recently in a small village just outside of York. The customer is living in a small cottage and they had problems with water getting into the chimney stack and into the house as well. The chimney stack is shared with their neighbour who also had similar problems. Each chimney pot had some sort of closing or terminal so the water couldn’t get inside through there. It didn’t require a lot of investigations to figure out that the mortar bed on the top on the chimney stack aka. flaunching (or haunching depending on which part of England you live) was shot, cracked and lose, letting water inside the stack. The only solution for this is to remove and to re-lay this cement bed, there is not a lot of repair you can do because the new layer and the old layer of mortar will separate eventually and will let the water in again.
This project was typically a job where I spent more times with phone calls and messages than the actual work. To start with, there was a lot of liaising with the customer and their neighbour about dates. This work needed access to the chimney, so I had to arrange scaffolding for the job. I spoke to and requested quotes from over 10 different scaffolding companies and (not) surprisingly only 2 replied. I had to accept that I just started out with my own business and as we never worked together with these companies before, my request landed right at the end of the queue. Eventually I managed to find a scaffolding company. Funny enough the guys also just recently started their own business, but they worked to high safety standards and they had tons of experience as they used to be employed by one of the biggest scaffold company in the North Yorkshire region.
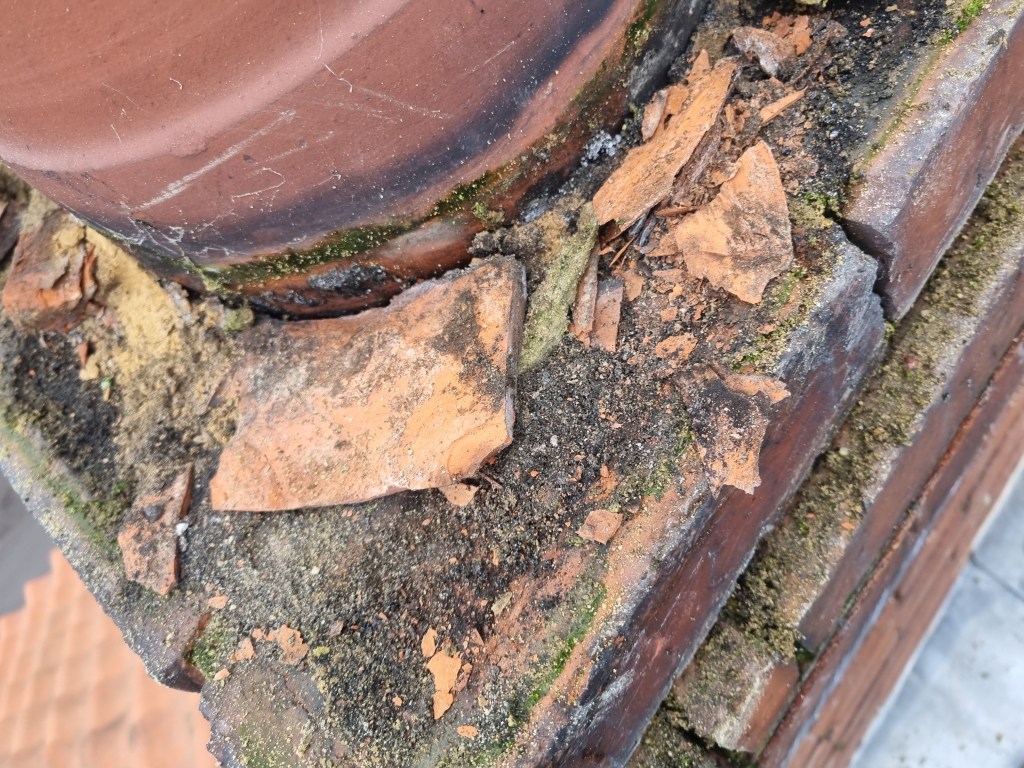
So after a lot of messages and phone calls, we agreed a date with the customer, their neighbour and the scaffolding company as well, so it was all ready to go. Materials-wise, I had a very simple shopping list: building sand, grit sand, cement, additives, bin bags. On the day, I arrived a bit earlier as agreed with the scaffolders so I could have a chat with them in person as well after so many calls and emails. We had a good chat and once the scaffold was ready, I could start with my work as well. It was a really straight forward job. The cement top was in a really bad shape, I could literally just pick up the old bits of mortar by hand, I needed very little hammering. Once all the old mortar was off, I dusted off the area completely and I started mixing the new mortar.

I used 2 part building sand, 1 part grit sand and 1 part cement for the mix. I also added a bit of frost proofer and accelerator as the temperature was only 6 Celsius out there and I didn’t want to risk that the new mortar won’t set properly. I was regularly checking the weather forecast as well, as I needed dry weather for at least the next 24 hours to make sure the flaunching will be set enough and won’t be washed away by the rain.

A couple of hours and a couple more buckets of mortar later I was finished. Before a final smoothening touch I had to clear down the scaffold and clear away my tools. Before I left, I checked that the mortar had no cracks and it’s smooth on every parts. I made a lots of photos throughout the entire project so I could show these pictures to the client as I can’t expect that they climb up onto the scaffold and check the work themselves. They appreciated this extra touch and they were very satisfied with the work carried out.


Hi, Where are you based – I need a similar job doing (on a detached house)? Regards, Elaine
LikeLike
Hi Elaine, Thanks for your message, Im York based 🙂
LikeLike
How long did this work take you?
LikeLike
Hi Lucy, once the scaffold is up and the weather allows to do cement work, it’s normally done within the day. Then you cover it with hessian for overnight and next day remove it, and scaffold is ready to come down. I hope this helps 🙂
LikeLike