
Just another typical handyman job, re-felting a shed roof. There were a few challenges on this occasion though. First, the size of the shed; it was a large 8 ft x 10 ft shed which takes a lot of felt and nails. Second: the location; it is situated in the very corner of a garden. This meant I had good access for two sides and really tight and squeezy access on the other two sides. Third: garden plants. Lots of it. The homeowner really likes her plants as there were a few dozens of large plant pots all over the garden. This meant, there were plenty of them around the shed as well. A large clematis was actually growing over the shed roof, climbing on a few steel wires.

My first task was to clear all pots away and very gently take off the large clematis from the roof. The plan was that once the felt is changed, I put back the steel wire over the roof and fold back and tie up the clematis as well. Once I moved all plants out of the way I set up my ladder and got to work. I started with the end boards on each end of the shed and after this, I could start to peel back the old felt. One side went really smoothly however I noticed that they put plenty enough bitumen paint under the felt making some part quite challenging to remove. Little did I know that this was the easy side.
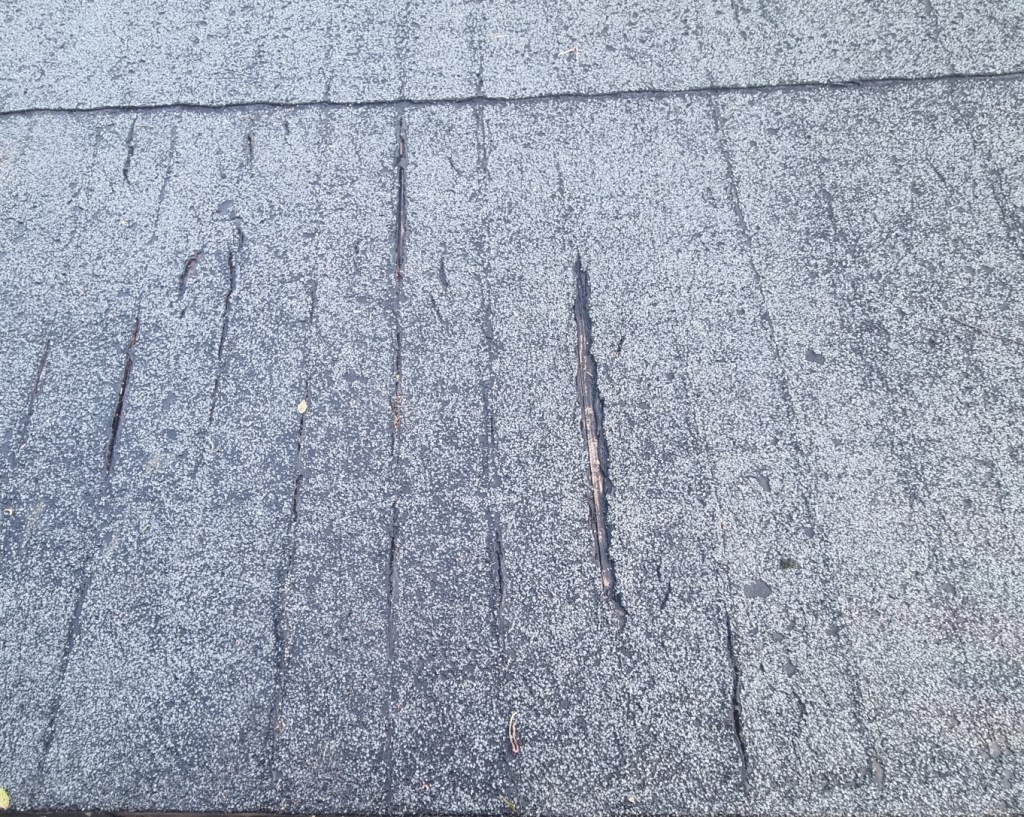
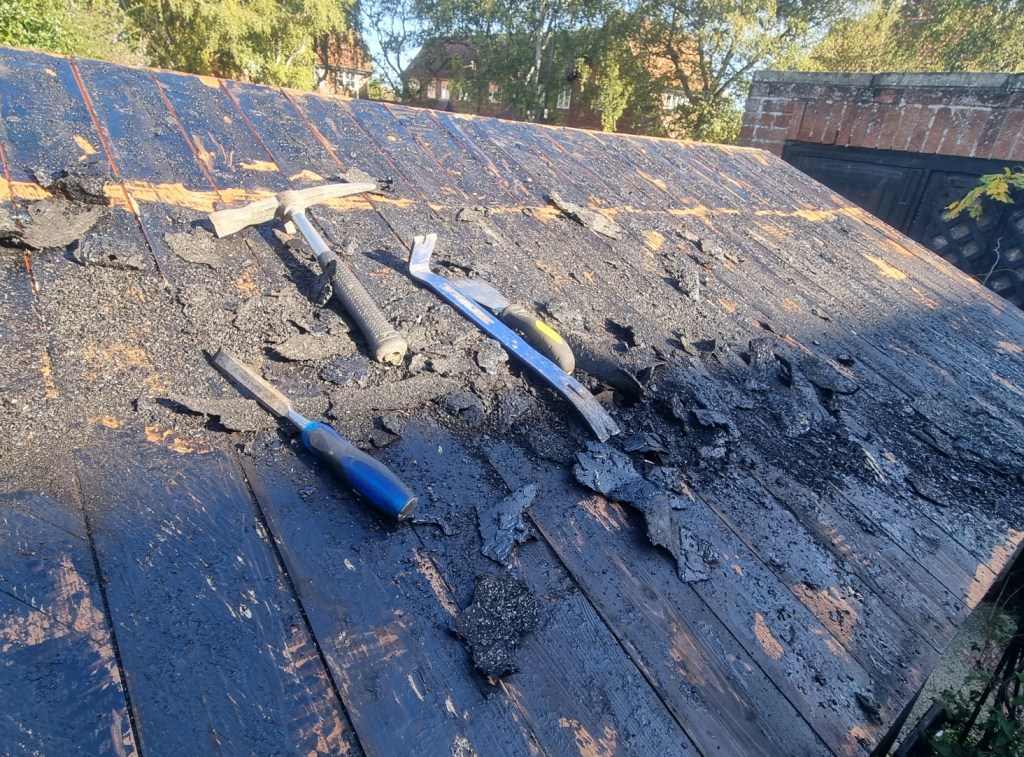
The other side was just plain impossible. This was the side where the sun shines mostly, so the felt was cracked everywhere and literally baked into the roof. I couldn’t take any larger chunks off that side, it was just a lot of scraping with every possible tools. Paint scraper, hammer and (old) chisel, small crowbar, I tried them all. The bitumen paint was everywhere in thick layer, the felt was just cracking, crumbling.
After what it felt like an eternity (about two and a half hours really) I finished taking off all the felt and scraping off the really large chunks of old bitumen paint too. Brushing off the roof and I was finally ready to sort out the new felt.
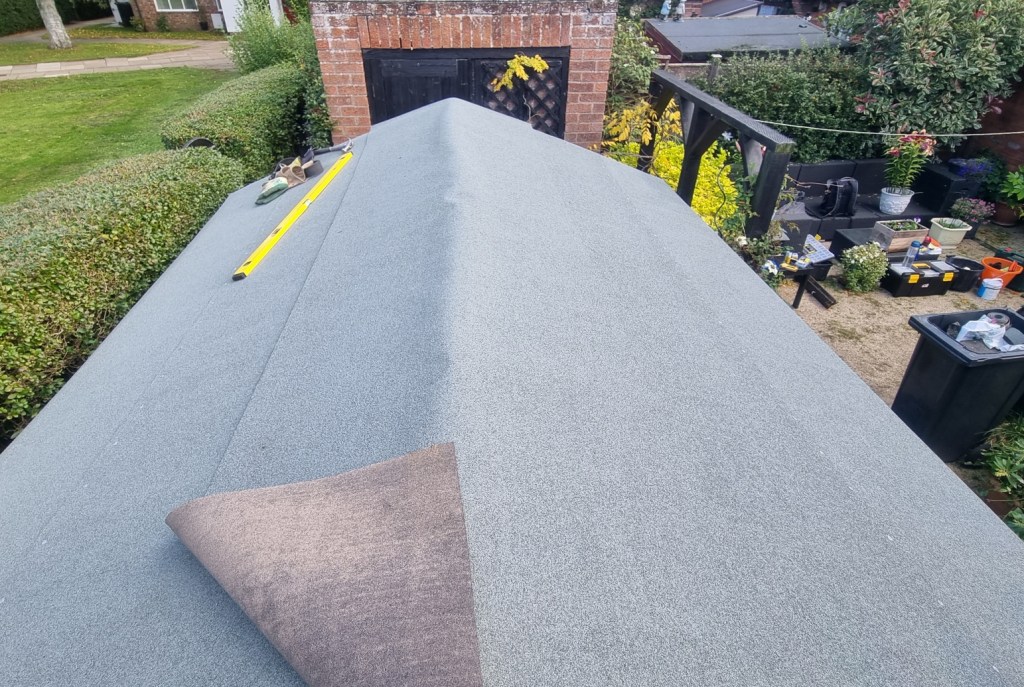
The old felt was installed in 3 strips in total. One on either side and over the top. The only problem was that this way you only had about 20 mm overlap. Unfortunately it’s far from enough as the recommended overlap is minimum 100 mm. This meant I had to install 5 strips instead of 3. This also meant a lot more cutting, measuring and nailing as well. I started on the bottom and worked my way up toward the ridge. I cut the top piece a little more narrow to give a nice finish for the roof. I used two different lengths if galvanised nails, 13 mm ones on the roof and 20 mm one on the sides and ends.
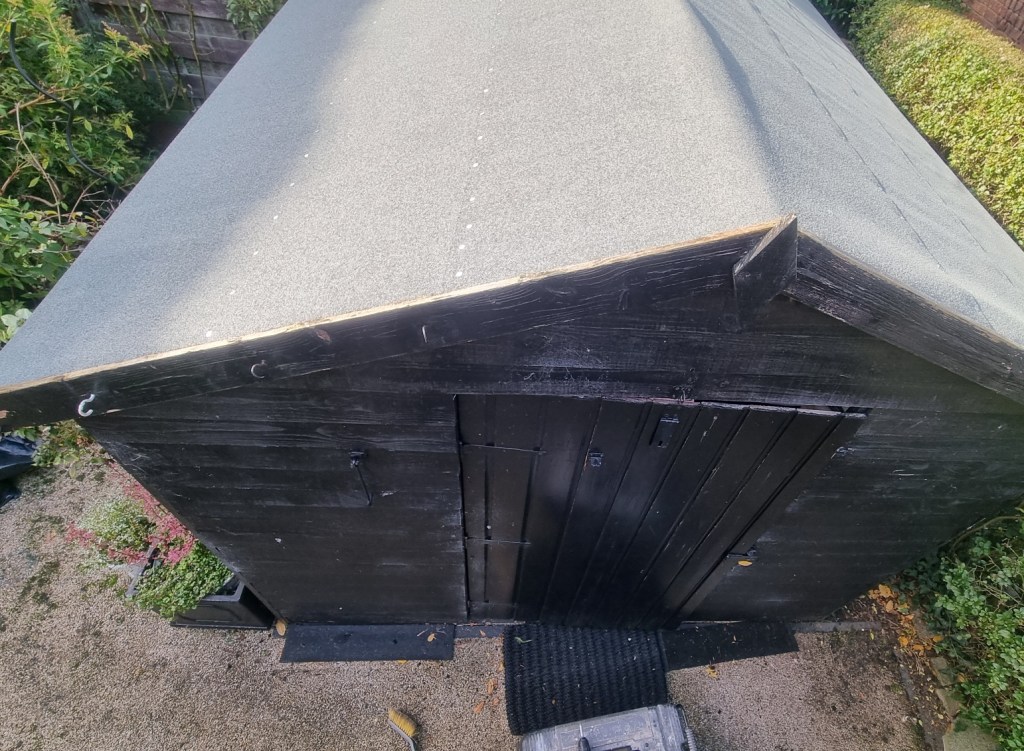
Once I finished with the roof, I re-installed the end boards and started clearing down all my tools, ladders and offcut materials. After this I re-fitted the steel wires over the roof and with the help of some cable ties, I folded back the clematis over the new roof. I advised the lady against it to guarantee longer life for the new felt, but she really loves the way her garden looks with the clematis over the shed.
This project nearly took me a full day and I definitely felt the pain in my legs after all day up and down on the ladder. On the other hand it was worth the pain and extra effort as the roof is watertight again and hopefully it will stay like this for the foreseeable future. The customer was happy, I packed up my gear and headed home.

