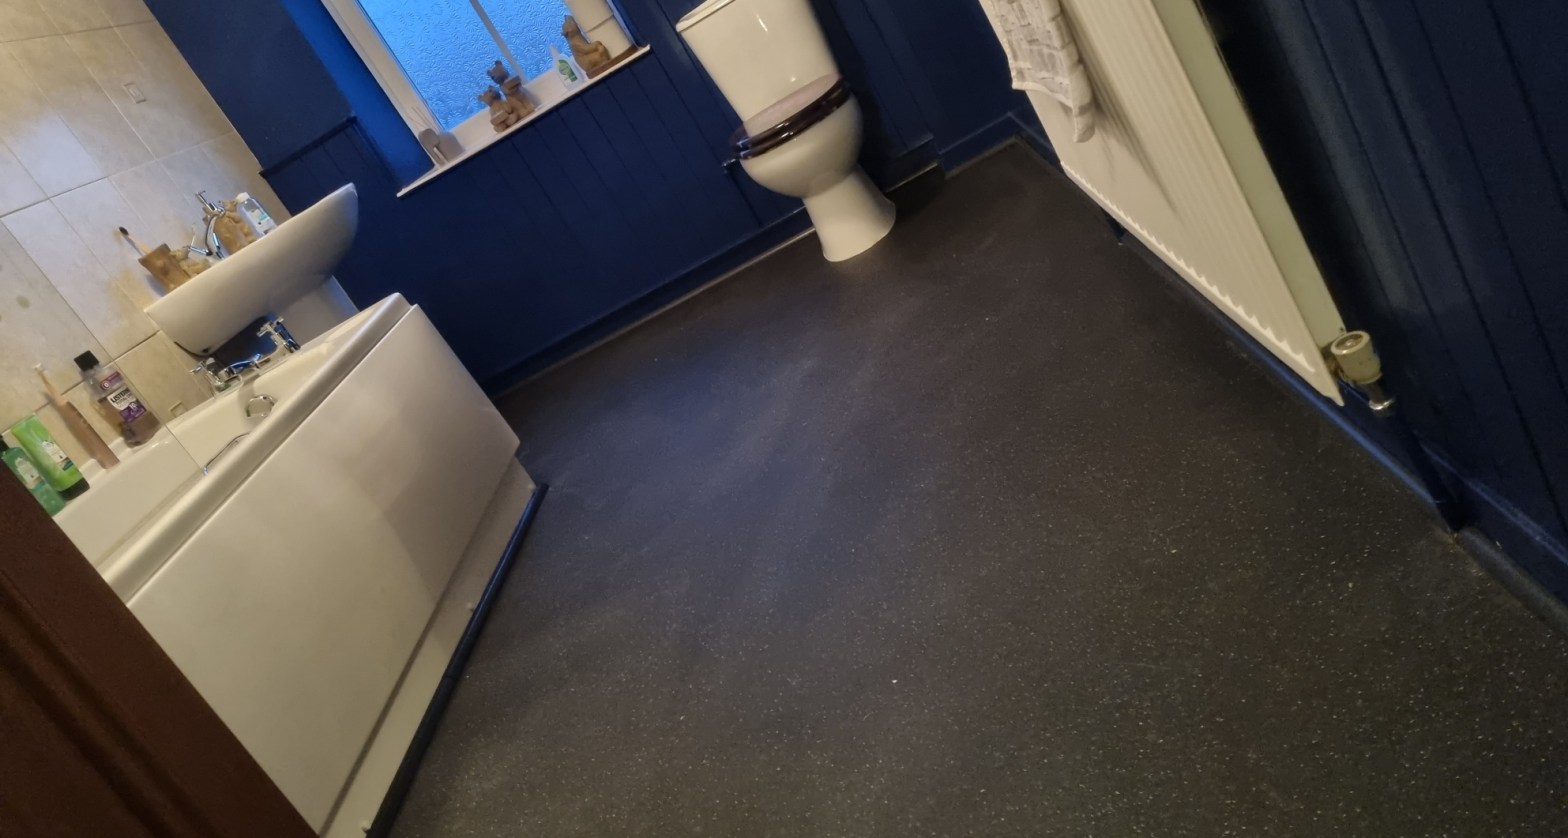
One of my regular customer had a new non-slip vinyl bathroom floor fitted earlier this year, but the edges were not finished, we had to find a solution.

To start with I had to find the right trims for the floor which were the right colour (anthracite grey in this case) and the right width. We really needed the widest possible beads as there were gaps around the bathtub panels on the floor. After a lengthy online research I found the right PVC beading on Amazon. I didn’t want to use wooden trims as the moisture would make them rot quickly.
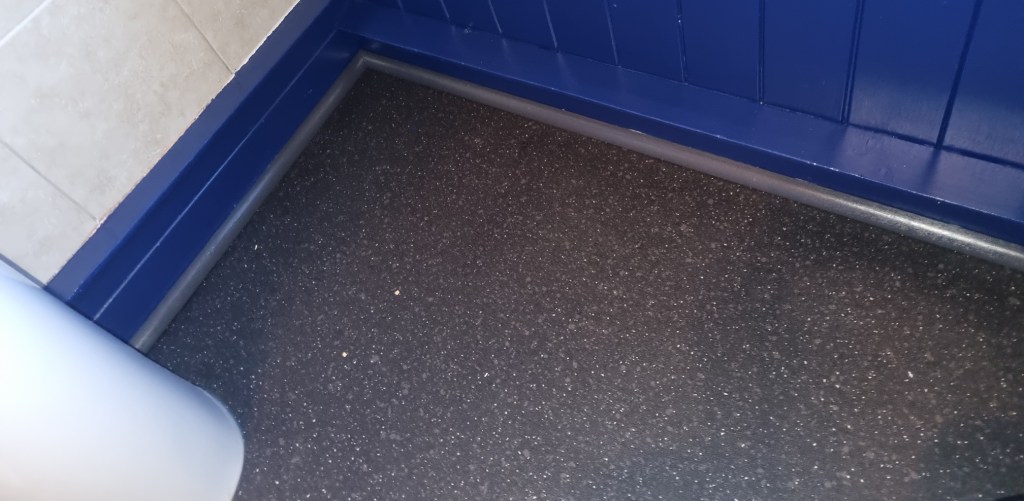
After a couple of weeks of waiting for the product, I could finally start to install them. The one thing which made this a really challenging install was the fact, that these beadings are made of very strong and hard PVC, so I ended up using a coping saw to cut the length and joints. This also meant that I could only glue the beading as the pins were not even scratching them. I used some fast setting adhesive for this task.

All in all took me a good 3 hours from start to finish, to cut and glue all the bits and pieces. But it worth it at the end as the result looks good and the customer is over the moon.
